上一篇
html录制视频
通过getUserMedia获取权限,MediaRecorder录制并处理视频
基础HTML结构与依赖
使用HTML5结合getUserMedia和MediaRecorder API实现视频录制功能,需确保在支持这些API的现代浏览器中运行(如Chrome、Firefox)。

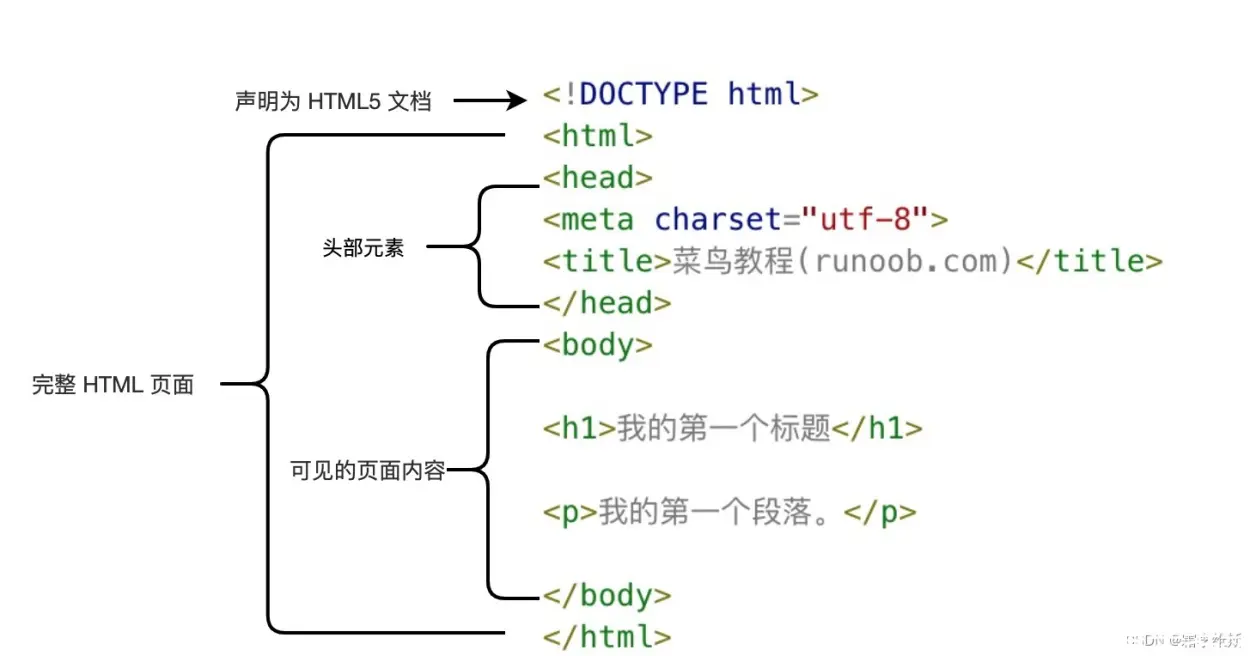
<!DOCTYPE html>
<html lang="zh">
<head>
  <meta charset="UTF-8">视频录制</title>
</head>
<body>
  <video id="preview" autoplay playsinline></video>
  <button id="start">开始录制</button>
  <button id="stop" disabled>停止录制</button>
  <a id="download" download="record.mp4">下载视频</a>
  <script>
    // JavaScript代码将插入此处
  </script>
</body>
</html>
核心步骤与代码实现
| 步骤 | 描述 | 代码示例 |
|---|---|---|
| 获取媒体流 | 请求摄像头和麦克风权限 | javascript<br>const constraints = { video: true, audio: true };<br>navigator.mediaDevices.getUserMedia(constraints).then(stream => {<br> document.getElementById('preview').srcObject = stream;<br>}); |
| 初始化MediaRecorder | 创建录制实例并绑定事件 | javascript<br>let mediaRecorder;<br>function initRecorder(stream) {<br> mediaRecorder = new MediaRecorder(stream);<br> mediaRecorder.ondataavailable = (e) => { recordedChunks.push(e.data); };<br>} |
| 控制录制状态 | 通过按钮启动/停止录制 | javascript<br>const recordedChunks = [];<br>document.getElementById('start').onclick = () => {<br> mediaRecorder.start();<br>};<br>document.getElementById('stop').onclick = () => {<br> mediaRecorder.stop();<br>}; |
| 生成视频文件 | 将录制数据转换为可下载文件 | javascript<br>mediaRecorder.onstop = () => {<br> const blob = new Blob(recordedChunks, { type: 'video/mp4' });<br> const url = URL.createObjectURL(blob);<br> document.getElementById('download').href = url;<br>}; |
完整JavaScript逻辑
const constraints = { video: true, audio: true };
let mediaRecorder;
let recordedChunks = [];
// 获取媒体流并显示预览
navigator.mediaDevices.getUserMedia(constraints)
  .then(stream => {
    document.getElementById('preview').srcObject = stream;
    initRecorder(stream);
  })
  .catch(err => alert(`错误: ${err}`));
// 初始化录制器
function initRecorder(stream) {
  mediaRecorder = new MediaRecorder(stream);
  mediaRecorder.ondataavailable = (event) => {
    if (event.data.size > 0) {
      recordedChunks.push(event.data);
    }
  };
  mediaRecorder.onstop = () => {
    const blob = new Blob(recordedChunks, { type: 'video/mp4' });
    const url = URL.createObjectURL(blob);
    document.getElementById('download').href = url;
    recordedChunks = []; // 重置数组
  };
}
// 绑定按钮事件
document.getElementById('start').onclick = () => {
  mediaRecorder.start();
  document.getElementById('start').disabled = true;
  document.getElementById('stop').disabled = false;
};
document.getElementById('stop').onclick = () => {
  mediaRecorder.stop();
  document.getElementById('start').disabled = false;
  document.getElementById('stop').disabled = true;
};
常见问题与解答
如何调整录制的视频分辨率或帧率?
- 解答:在
getUserMedia的约束条件中设置video参数,const constraints = { video: { width: 1280, height: 720, frameRate: 30 }, audio: true };注意:实际效果依赖设备硬件支持。
如何将录制的视频上传到服务器?
- 解答:使用
FormData配合fetch提交Blob:mediaRecorder.onstop = () => { const blob = new Blob(recordedChunks, { type: 'video/mp4' }); const formData = new FormData(); formData.append('file', blob, 'record.mp4'); fetch('/upload', { method: 'POST', body: formData }) .then(response => response.json()) .then(data => console.log(data)); };需在服务器端处理
/upload接口的文件