上一篇
apache网站发布新手如何操作步骤详解?
Apache HTTP Server作为全球最广泛使用的Web服务器软件之一,其强大的稳定性和灵活的配置能力使其成为网站发布的首选方案,无论是个人博客、企业官网还是大型电商平台,Apache都能通过合理的配置满足多样化的网站部署需求,本文将详细介绍从环境准备到线上发布的完整流程,涵盖关键配置要点、安全优化及性能调优实践,帮助用户构建高效可靠的网站服务环境。
环境准备与基础安装
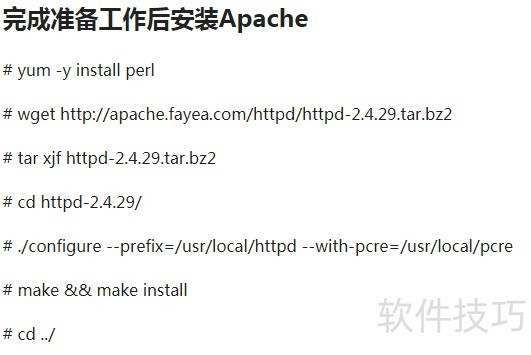
在开始Apache网站发布前,需确保服务器环境满足基本要求,以Linux系统为例,推荐使用CentOS或Ubuntu等主流发行版,首先更新系统软件包列表,执行sudo apt update(Ubuntu)或sudo yum update(CentOS)命令,随后安装Apache服务,Ubuntu系统通过sudo apt install apache2命令,而CentOS系统则使用sudo yum install httpd,安装完成后,通过systemctl start apache2(Ubuntu)或systemctl start httpd(CentOS)启动服务,并设置开机自启systemctl enable apache2。
默认情况下,Apache的网站根目录位于/var/www/html(Ubuntu)或/var/www/html(CentOS),配置文件路径为/etc/apache2/apache2.conf(Ubuntu)或/etc/httpd/conf/httpd.conf(CentOS),首次启动后,可通过浏览器访问服务器IP地址,若看到Apache默认测试页面,则说明安装成功,建议在正式部署前,使用sudo ufw allow 'Apache Full'(Ubuntu)或sudo firewall-cmd --permanent --add-service=http(CentOS)命令开放HTTP和HTTPS端口。
虚拟主机配置实践
虚拟主机技术允许单台服务器托管多个独立网站,这是Apache的核心功能之一,配置虚拟主机需创建独立的配置文件,通常存放于sites-available目录(Ubuntu)或conf.d目录(CentOS),以配置example.com域名为例,首先创建配置文件sudo nano /etc/apache2/sites-available/example.com.conf(Ubuntu),输入以下基础配置:
<VirtualHost *:80> ServerName example.com ServerAlias www.example.com DocumentRoot /var/www/example.com <Directory /var/www/example.com> Options Indexes FollowSymLinks AllowOverride All Require all granted </Directory> ErrorLog ${APACHE_LOG_DIR}/error.log CustomLog ${APACHE_LOG_DIR}/access.log combined </VirtualHost>
配置完成后,Ubuntu系统需使用sudo a2ensite example.com.conf启用站点,CentOS系统则将文件保存为/etc/httpd/conf.d/example.com.conf,创建网站根目录sudo mkdir -p /var/www/example.com并设置权限sudo chown -R $USER:$USER /var/www/example.com,最后重启Apache服务使配置生效,通过sudo apache2ctl configtest(Ubuntu)或sudo apachectl configtest(CentOS)可检查配置语法正确性。
SSL证书配置与HTTPS启用
现代网站必须支持HTTPS协议以保障数据传输安全,可通过Let’s Encrypt免费获取SSL证书,首先安装Certbot工具:Ubuntu系统执行sudo apt install certbot python3-certbot-apache,CentOS系统使用sudo yum install certbot python3-certbot-apache,获取证书命令为sudo certbot --apache -d example.com -d www.example.com,Certbot会自动检测Apache配置并修改虚拟主机文件,添加以下SSL配置段:
<VirtualHost *:443> ServerName example.com DocumentRoot /var/www/example.com SSLEngine on SSLCertificateFile /etc/letsencrypt/live/example.com/fullchain.pem SSLCertificateKeyFile /etc/letsencrypt/live/example.com/privkey.pem Include /etc/letsencrypt/options-ssl-apache.conf </VirtualHost>
证书默认有效期为90天,建议设置自动续期:执行sudo crontab -e添加定时任务0 12 * * * /usr/bin/certbot renew --quiet,配置完成后,通过浏览器访问https://example.com验证HTTPS是否正常启用,检查地址栏是否显示安全锁标志。
性能优化与安全加固
Apache的性能优化需从多维度入手,首先启用mod_defend模块防护攻破,在配置文件中添加:
针对静态资源缓存,配置以下指令:
<IfModule mod_expires.c> ExpiresActive On ExpiresByType text/css "access plus 1 year" ExpiresByType application/javascript "access plus 1 year" ExpiresByType image/jpeg "access plus 1 month" ExpiresByType image/png "access plus 1 month" </IfModule>
安全加固方面,需禁用不必要的HTTP方法,在虚拟主机配置中添加:
<LimitExcept GET POST HEAD> Require all denied </LimitExcept>
同时隐藏Apache版本信息,编辑主配置文件添加ServerSignature Off和ServerTokens Prod,建议定期使用sudo apt upgrade apache2(Ubuntu)或sudo yum update httpd(CentOS)更新软件版本,及时修复安全漏洞。

日志管理与故障排查
Apache的日志记录是网站运维的重要依据,默认访问日志格式为combined,包含客户端IP、访问时间、请求方法、路径状态码等信息,可通过CustomLog指令自定义日志格式,
LogFormat "%h %l %u %t "%r" %>s %b "%{Referer}i" "%{User-Agent}i"" combined
对于高流量网站,建议使用rotatelogs工具实现日志分割:
CustomLog "|/usr/bin/rotatelogs /var/log/apache2/access_%Y%m%d.log 86400" combined
常见故障排查方法包括:检查Apache服务状态systemctl status apache2,查看错误日志tail -f /var/log/apache2/error.log,验证配置语法apache2ctl configtest,以及检查文件权限ls -la /var/www/example.com,当遇到403 Forbidden错误时,重点检查DocumentRoot目录权限和<Directory>配置段的AllowOverride指令;500错误则需查看错误日志中的具体错误信息定位问题。
通过以上步骤,用户可以完成从零开始的Apache网站发布流程,随着业务发展,还可结合负载均衡、缓存代理等技术进一步优化架构,Apache的模块化设计使其具备极强的扩展能力,合理利用mod_php、mod_wsgi、mod_proxy等模块,能满足从静态网站到复杂Web应用的各类部署需求,持续关注官方文档和社区更新,是保持服务器安全稳定运行的关键。