上一篇
Apache服务器搭建每日播客的具体步骤有哪些?
Apache服务器搭建每日播客
准备工作:系统环境与工具安装
在搭建每日播客服务前,需确保服务器满足基本要求,推荐使用Linux操作系统(如Ubuntu 20.04或CentOS 8),并安装Apache服务器(HTTPD),需准备以下工具:
- Apache HTTPD服务器:用于托管播客音频文件。
- FFmpeg:用于处理音频格式转换(如MP3转M4A)。
- 文本编辑器:如Vim或Nano,用于配置文件修改。
- 域名与SSL证书:若需HTTPS访问,需配置Let’s Encrypt免费证书。
系统环境配置示例(Ubuntu):
sudo apt update && sudo apt upgrade -y sudo apt install apache2 ffmpeg -y sudo systemctl enable apache2 sudo systemctl start apache2
管理:音频文件与元数据
每日播客的核心是音频内容,需规范文件命名与存储结构,建议按日期命名文件(如20231015_episode.mp3),并统一存放于服务器的/var/www/podcast/目录下。
目录结构示例:
/var/www/podcast/ ├── episodes/ # 存放音频文件 │ ├── 20231015_episode.mp3 │ └── 20231016_episode.mp3 ├── rss.xml # RSS订阅源文件 └── index.html # 播客主页
音频处理建议:
- 格式:优先使用MP3(兼容性强)或M4A(支持更高质量音频)。
- 码率:建议128-192kbps,平衡音质与带宽消耗。
- 元数据:使用FFmpeg添加标题、艺术家、专辑等信息: ffmpeg -i input.wav -metadata title="Episode 1" -metadata artist="Podcast Host" output.mp3
Apache服务器配置:虚拟主机与权限
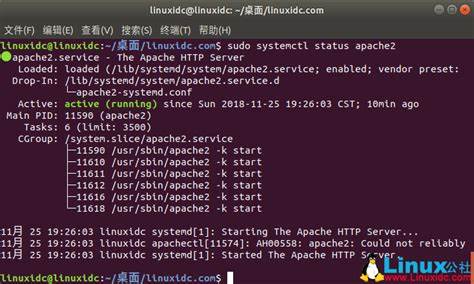
Apache需配置虚拟主机以托管播客内容,并确保文件可被外部访问。
创建虚拟主机配置文件
在/etc/apache2/sites-available/下创建podcast.conf:
<VirtualHost *:80> ServerName podcast.example.com DocumentRoot /var/www/podcast/ <Directory /var/www/podcast/> Options Indexes FollowSymLinks AllowOverride All Require all granted </Directory> <Directory /var/www/podcast/episodes/> # 禁用目录列表(可选) Options -Indexes </Directory> </VirtualHost>
启用配置并重启Apache
sudo a2ensite podcast.conf sudo systemctl reload apache2
配置HTTPS(可选)
使用Certbot获取Let’s Encrypt证书:

sudo apt install certbot python3-certbot-apache -y sudo certbot --apache -d podcast.example.com
生成RSS订阅源:实现播客自动更新
RSS是播客订阅的核心,需动态生成包含最新音频文件的XML文件,可编写Shell脚本每日更新RSS,并通过cron定时任务执行。
RSS脚本示例(generate_rss.sh):
#!/bin/bash PODCAST_DIR="/var/www/podcast/episodes" RSS_FILE="/var/www/podcast/rss.xml" # 清空旧RSS文件 cat > "$RSS_FILE" << EOF <?xml version="1.0" encoding="UTF-8"?> <rss xmlns:itunes="http://www.itunes.com/dtds/podcast-1.0.dtd" version="2.0"> <channel> 每日播客</title> <description>每日更新的优质播客内容</description> <link>https://podcast.example.com</link> <language>zh-CN</language> EOF # 遍历音频文件并添加条目 for file in "$PODCAST_DIR"/*.mp3; do filename=$(basename "$file") date=$(echo "$filename" | cut -d'_' -f1) $(echo "$filename" | sed 's/.mp3$//' | sed 's/^[0-9]{8}_//') duration=$(ffprobe -i "$file" -show_entries format=duration -v quiet -of csv="p=0" | awk -F. '{print $1}') cat >> "$RSS_FILE" << EOF <item> <title>$title</title> <description>播客内容:$title</description> <pubDate>$(date -d "$date" -R)</pubDate> <enclosure url="https://podcast.example.com/episodes/$filename" length="$(stat -c%s "$file")" type="audio/mpeg"/> <itunes:duration>$duration</itunes:duration> </item> EOF done # 关闭RSS标签 cat >> "$RSS_FILE" << EOF </channel> </rss>
设置定时任务
crontab -e # 添加以下行,每日凌晨1点执行 0 1 * * * /path/to/generate_rss.sh
播客主页设计与用户交互
播客主页需提供音频播放、历史列表与订阅引导,可使用HTML5的<audio>标签实现内嵌播放器,并通过表格展示历史节目。
主页代码示例(index.html):
<!DOCTYPE html> <html lang="zh-CN"> <head> <meta charset="UTF-8"> 每日播客</title> <style> table { border-collapse: collapse; width: 100%; } th, td { border: 1px solid #ddd; padding: 8px; text-align: left; } th { background-color: #f2f2f2; } </style> </head> <body> <h1>每日播客</h1> <p>订阅RSS:<a href="rss.xml">rss.xml</a></p> <h2>最新节目</h2> <audio controls src="episodes/20231016_episode.mp3"></audio> <h2>历史节目</h2> <table> <tr> <th>日期</th> <th>标题</th> <th>播放</th> </tr> <tr> <td>2023-10-16</td> <td>Episode 2</td> <td><audio controls src="episodes/20231016_episode.mp3"></audio></td> </tr> <tr> <td>2023-10-15</td> <td>Episode 1</td> <td><audio controls src="episodes/20231015_episode.mp3"></audio></td> </tr> </table> </body> </html>
优化与维护:性能监控与安全
- 日志监控:定期检查Apache日志(/var/log/apache2/access.log)分析访问量。
- 备份策略:每日备份音频文件与RSS配置,避免数据丢失。
- 安全加固:
- 禁用不必要的Apache模块(如autoindex)。
- 使用防火墙(UFW)限制非必要端口访问。
通过以上步骤,即可搭建一个稳定、高效的每日播客服务,为听众提供流畅的订阅与播放体验。
相关文章
-
VPS性能优化教程怎么做?Making Implicit Concepts Explicit隐式概念显式化原则
-

VPS性能优化教程,Language of the Domain领域语言原则是什么?
-
VPS性能优化教程,Binding Model绑定模型实现原则是什么?
-
VPS性能优化教程怎么做?VPS性能优化方法详解
-
VPS性能优化教程怎么做?VPS优化方法详解
-

VPS性能优化教程,Refactoring Toward Deeper Insight重构深入洞察原则,VPS如何进行性能优化?
-

VPS性能优化教程:Hands-On Modelers实践建模者原则
-
AS4837青云互联悉尼VPS路由分析,青云互联悉尼VPS怎么样