上一篇
AngularJS如何实现图片上传和预览?方法有哪些?
AngularJS实现图片上传和预览功能的方法分析
在Web开发中,图片上传和预览是常见的需求,尤其是在用户头像、商品图片等场景中,AngularJS作为一款经典的前端框架,通过其数据绑定和模块化特性,能够高效实现这一功能,本文将从核心原理、具体实现步骤、代码优化及注意事项四个方面,详细分析AngularJS实现图片上传和预览的方法。
核心原理与依赖准备
AngularJS实现图片上传和预览的核心在于利用ng-model双向数据绑定、ng-change事件监听以及FileReader API,用户选择图片后,通过<input type="file">触发文件读取,FileReader将图片转换为Base64或Data URL格式,最终绑定到<img>标签实现预览,上传功能则需结合$http服务与后端API交互。
依赖准备:
- AngularJS核心库(建议版本1.6以上,兼容性更好)
- 可选:angular-file-upload模块(简化文件上传逻辑)
基础实现步骤
HTML结构设计
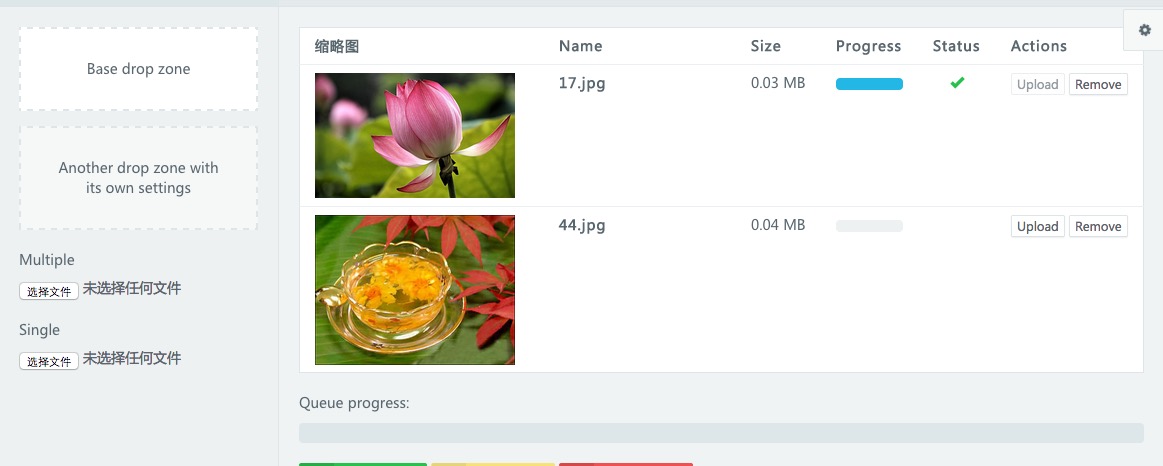
在AngularJS应用中,需定义文件输入控件、预览区域及上传按钮,通过ng-model绑定文件对象,ng-change触发预览逻辑。
控制器逻辑实现
在控制器中,通过FileReader读取文件并生成预览URL,同时封装上传方法。
angular.module('app', []).controller('ImageController', function($scope, $http) { $scope.previewUrl = ''; $scope.imageFile = null; $scope.previewImage = function() { if ($scope.imageFile && $scope.imageFile.files && $scope.imageFile.files[0]) { const file = $scope.imageFile.files[0]; const reader = new FileReader(); reader.onload = function(e) { $scope.previewUrl = e.target.result; $scope.$apply(); // 手动触发数据更新 }; reader.readAsDataURL(file); } }; $scope.uploadImage = function() { if (!$scope.imageFile) return; const formData = new FormData(); formData.append('file', $scope.imageFile.files[0]); $http.post('/api/upload', formData, { headers: {'Content-Type': undefined}, transformRequest: angular.identity }).then(function(response) { alert('上传成功!'); }, function(error) { alert('上传失败:' + error.data); }); }; });
关键点解析
- ng-model与文件对象:ng-model绑定的是<input>元素的files属性,需通过imageFile.files[0]获取实际文件。
- FileReader异步处理:readAsDataURL为异步操作,需在onload回调中更新$scope.previewUrl并调用$scope.$apply()触发视图刷新。
- FormData与$http上传:使用FormData封装文件数据,设置Content-Type: undefined让浏览器自动设置正确的multipart/form-data格式。
优化与扩展功能
多图片上传与预览
若需支持多图片,修改HTML结构并遍历文件列表:
<input type="file" multiple ng-model="imageFiles" ng-change="previewImages()"> <div ng-repeat="url in previewUrls"> <img ng-src="{{url}}" alt="预览图"> </div>
控制器中调整预览逻辑:
$scope.previewUrls = []; $scope.previewImages = function() { $scope.previewUrls = []; if ($scope.imageFiles && $scope.imageFiles.files) { Array.from($scope.imageFiles.files).forEach(file => { const reader = new FileReader(); reader.onload = function(e) { $scope.previewUrls.push(e.target.result); $scope.$apply(); }; reader.readAsDataURL(file); }); } };
图片压缩与格式校验
在预览前添加校验逻辑,例如限制文件类型和大小:
$scope.previewImage = function() { const file = $scope.imageFile.files[0]; if (!file.type.match('image.*')) { alert('请选择图片文件!'); return; } if (file.size > 5 * 1024 * 1024) { // 限制5MB alert('图片大小不能超过5MB!'); return; } // 后续读取逻辑... };
使用angular-file-upload模块
简化上传逻辑,需引入模块文件:
angular.module('app', ['angularFileUpload']).controller('ImageController', function($scope, Upload) { $scope.uploadImage = function() { Upload.upload({ url: '/api/upload', data: {file: $scope.imageFile.files[0]} }).then(function(response) { alert('上传成功!'); }); }; });
注意事项与常见问题
| 问题 | 解决方案 |
|---|---|
| 预览图片不显示 | 检查$scope.$apply()是否调用,或使用ng-src替代src |
| 上传失败 | 确认后端API正确接收FormData,检查网络请求头 |
| 内存占用高 | 大图片预览时,可限制预览尺寸或使用压缩库(如compressorjs) |
| 跨域问题 | 后端需配置CORS,允许前端域名访问 |
AngularJS通过FileReader和$http服务,结合数据绑定机制,能够灵活实现图片上传与预览功能,开发者可根据需求选择基础实现或借助第三方模块优化,同时需注意文件校验、性能优化及跨域处理等细节,掌握这些方法,不仅能提升用户体验,也为后续功能扩展(如图片裁剪、滤镜)奠定基础。
相关文章
-

VPS性能优化教程怎么做?Making Implicit Concepts Explicit隐式概念显式化原则
-
VPS性能优化教程,Language of the Domain领域语言原则是什么?
-
VPS性能优化教程,Binding Model绑定模型实现原则是什么?
-
VPS性能优化教程怎么做?VPS性能优化方法详解
-
VPS性能优化教程怎么做?VPS优化方法详解
-
VPS性能优化教程,Refactoring Toward Deeper Insight重构深入洞察原则,VPS如何进行性能优化?
-
VPS性能优化教程:Hands-On Modelers实践建模者原则
-
AS4837青云互联悉尼VPS路由分析,青云互联悉尼VPS怎么样