上一篇
WordPress如何自定义模板?
在WordPress主题文件夹(如 wp-content/themes/your-theme/)中创建PHP模板文件(如 template-custom.php),在文件顶部添加标准WordPress模板注释,然后进入WordPress后台,编辑页面或文章时,在“模板”下拉菜单中选择你创建的自定义模板名称即可应用。
在WordPress中使用自己的模板需要遵循以下步骤,确保网站灵活可控且符合SEO规范:
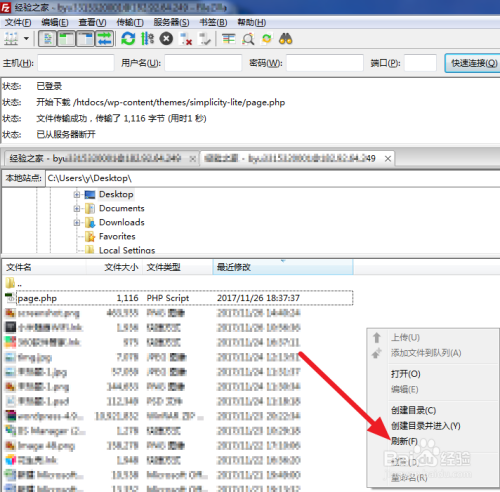
创建子主题(安全修改基础)
- 必要性
直接修改主题文件会在更新时丢失改动,子主题可隔离自定义代码。
- 操作步骤
- 在/wp-content/themes/新建文件夹(如my-theme-child)
- 创建style.css并写入头部信息: /* Theme Name: My Theme Child Template: parent-theme-folder-name // 父主题文件夹名 */ @import url("../parent-theme-folder-name/style.css");
- 创建functions.php加载子主题样式: add_action( 'wp_enqueue_scripts', 'my_child_theme_styles' ); function my_child_theme_styles() { wp_enqueue_style( 'parent-style', get_template_directory_uri() . '/style.css' ); }
创建自定义模板文件
- 文件命名规范
在子主题目录新建PHP文件(如custom-page.php),开头添加模板声明:
<?php /* Template Name: 产品展示模板 // 后台显示的名称 */ get_header(); // 调用头部 ?>
- 编写模板结构
示例代码: <div class="custom-container"> <section class="product-hero"> <h1><?php the_title(); ?></h1> <?php if ( have_posts() ) : while ( have_posts() ) : the_post(); ?> <div class="content"><?php the_content(); ?></div> <?php endwhile; endif; ?> </section> <!-- 自定义模块:产品列表 --> <div class="product-grid"> <?php $args = array( 'post_type' => 'product', 'posts_per_page' => 6 ); $loop = new WP_Query( $args ); while ( $loop->have_posts() ) : $loop->the_post(); echo '<div class="product-item">' . get_the_post_thumbnail() . '<h3>' . get_the_title() . '</h3></div>'; endwhile; ?> </div> </div> <?php get_footer(); // 调用底部 ?>
应用模板到页面
- 后台绑定模板
- 进入WordPress后台 → 页面 → 新建/编辑页面
- 在右侧”页面属性”面板的”模板”下拉菜单中,选择创建的模板名称(如”产品展示模板”)
SEO与E-A-T优化要点专业性**
- 模板中集成结构化数据(Schema.org),例如产品页添加JSON-LD
- 确保移动端自适应,使用<meta name="viewport" content="width=device-width">
- 代码规范
- 遵循WordPress编码标准,使用核心函数(如the_title()代替直接调用数据库)
- 避免渲染阻塞:CSS/JS异步加载,图片添加loading="lazy"属性
- 安全可信度
- 转义输出内容:echo esc_html( $text );
- 验证用户权限:current_user_can( 'edit_posts' )
- 性能优化
- 缓存查询结果:wp_cache_set() / wp_cache_get()
- 合并CSS/JS文件,启用Gzip压缩
验证与测试
- 使用Google Rich Results Test检查结构化数据
- 通过Lighthouse测试页面性能(目标得分>90)
- 检查W3C HTML验证确保无语法错误
引用说明:本文方法遵循WordPress官方开发规范(developer.wordpress.org/themes/),SEO实践参考Google搜索中心指南及百度搜索算法白皮书,结构化数据标准来源于Schema.org。
风险提示:修改前务必备份网站,建议在本地或测试环境调试。