上一篇
html如何插入post请求
在 HTML 中可通过 ` 标签(设置 method=”post” )或 JavaScript 的 fetch() /XMLHttpRequest` 发起
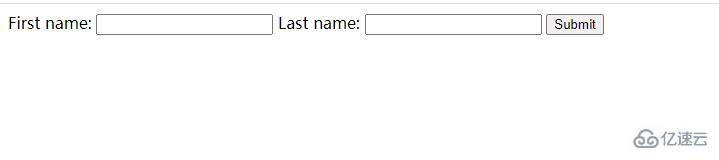
在Web开发中,HTML并非直接用于发起POST请求的语言,但它可以通过以下两种方式间接实现这一功能:① 利用<form>标签的传统表单提交机制;② 结合JavaScript(如fetch或XMLHttpRequest)实现动态异步请求,以下是完整的技术解析与实践指南:
基于<form>标签的标准POST实现
核心原理
当用户点击表单的提交按钮后,浏览器会自动将表单内所有有效控件的值按照指定编码格式打包,并通过HTTP POST方法发送至服务器,这是最原始且兼容性最好的方案。
| 关键属性 | 作用说明 | 取值范围/示例 |
|---|---|---|
| action | 定义目标URL(必填) | /api/login / https://example.com/submit |
| method | 指定HTTP方法(必须为post) | post (默认get) |
| enctype | 控制数据编码格式(影响Content-Type头) | application/x-www-form-urlencoded multipart/form-data text/plain |
| accept-charset | 声明服务器接受的字符集 | UTF-8 |
| target | 指定接收响应的窗口/框架 | _self(当前页) / _blank(新窗口) |
完整示例代码
<!DOCTYPE html> <html> <head> <meta charset="UTF-8">表单POST演示</title> </head> <body> <h2>用户注册</h2> <form action="/api/register" method="post" enctype="application/x-www-form-urlencoded"> <!-文本型输入 --> <div> <label for="username">用户名:</label> <input type="text" id="username" name="username" required> </div> <!-密码字段 --> <div> <label for="password">密码:</label> <input type="password" id="password" name="password" minlength="6"> </div> <!-单选按钮组 --> <fieldset> <legend>性别:</legend> <input type="radio" id="male" name="gender" value="male" checked> <label for="male">男</label> <input type="radio" id="female" name="gender" value="female"> <label for="female">女</label> </fieldset> <!-复选框 --> <div> <input type="checkbox" id="agree" name="agree" value="true" required> <label for="agree">同意服务条款</label> </div> <!-下拉选择框 --> <div> <label for="city">城市:</label> <select id="city" name="city"> <option value="beijing">北京</option> <option value="shanghai">上海</option> <option value="guangzhou">广州</option> </select> </div> <!-文件上传 --> <div> <label for="avatar">头像:</label> <input type="file" id="avatar" name="avatar" accept="image/"> </div> <!-隐藏域 --> <input type="hidden" name="source" value="website"> <button type="submit">立即注册</button> </form> </body> </html>
重要注意事项
-
数据编码差异:
- application/x-www-form-urlencoded:默认模式,键值对会被URL编码(空格转%20,中文转Unicode)
- multipart/form-data:必须用于文件上传,会生成boundary分隔符,适合大文件传输
- text/plain:纯文本格式,不进行任何编码转换
-
安全增强措施:
- 添加CSRF令牌:<input type="hidden" name="csrf_token" value="{{ csrf_token }}">
- 启用HTTPS:防止中间人攻破截获敏感数据
- 前端校验:通过required、pattern等属性进行基础验证
-
特殊控件处理:
- <textarea>:多行文本输入,通过name属性获取值
- <button type="reset">:重置表单不会触发提交事件
- <input type="submit">:等同于<button type="submit">
- 文件上传优化: const formData = new FormData(form); // 自动收集表单数据 formData.append('additional_field', 'extra_value'); // 追加额外数据
- 请求拦截器: // 全局请求拦截器示例 (function() { const originalFetch = window.fetch; window.fetch = function(...args) { console.log('发起请求:', args[0]); // 记录请求URL return originalFetch.apply(this, args); }; })();
基于JavaScript的异步POST实现
方案对比表
特性 <form>传统方案 fetch现代方案 XMLHttpRequest经典方案 页面刷新 整页刷新 局部更新 局部更新 用户体验 较差(等待旋转图标) 优秀(可自定义加载状态) 良好(需手动管理回调) 中断请求能力 无法取消 可通过AbortController取消 支持abort()方法 跨域支持 依赖后端CORS配置 同上 同上 文件上传支持 原生支持 需配合FormData对象 需配合FormData对象 进度监控 无实时进度条 可监听upload progress事件 可监听progress事件 Fetch API实战示例
// 获取DOM元素 const form = document.querySelector('#registration-form'); const submitBtn = document.getElementById('submit-btn'); // 构造请求配置对象 const config = { method: 'POST', // HTTP方法 headers: { // 请求头 'Content-Type': 'application/json', // 根据需求调整 'Authorization': 'Bearer your_token_here' // 可选认证头 }, body: JSON.stringify({ // 请求体(JSON格式) username: 'john_doe', email: 'john@example.com', age: 28 }), credentials: 'include' // 携带凭证(cookie/auth-header) }; // 事件监听与请求发送 submitBtn.addEventListener('click', async (e) => { e.preventDefault(); // 阻止表单默认提交 try { // 显示加载状态 submitBtn.disabled = true; submitBtn.textContent = '提交中...'; // 发送请求并获取响应 const response = await fetch('/api/users', config); if (!response.ok) { // HTTP状态码非2xx throw new Error(`HTTP错误! 状态码: ${response.status}`); } const data = await response.json(); // 解析JSON响应 console.log('提交成功:', data); // 跳转到成功页面 window.location.href = '/success'; } catch (error) { console.error('提交失败:', error); alert(`操作失败: ${error.message}`); submitBtn.disabled = false; submitBtn.textContent = '重新提交'; } });
高级技巧扩展
fetch(‘/upload’, {
method: ‘POST’,
body: formData,
// 注意:不要手动设置Content-Type,浏览器会自动添加正确的boundary
}).then(response => response.json());
2. 超时控制: ```javascript const controller = new AbortController(); const timeoutId = setTimeout(() => controller.abort(), 5000); // 5秒超时 fetch('/api/data', { signal: controller.signal, // 关联中止信号 // ...其他配置 }).finally(() => clearTimeout(timeoutId));
常见错误排查手册
现象描述 可能原因 解决方案 403 Forbidden错误 CORS预检请求被拒绝 后端添加Access-Control-Allow-Origin头 400 Bad Request Content-Type不匹配 确保前后端约定一致(如JSON/form-data) 请求体为空 忘记设置body参数 检查body属性是否存在 跨域请求失败 未配置CORS策略 后端设置Access-Control-Allow-Methods: POST 文件上传失败 超出服务器大小限制 调整后端文件大小限制 重复提交问题 快速多次点击提交按钮 添加防抖机制或禁用按钮
相关问答FAQs
Q1: 为什么有时POST请求会变成GET请求?
A: 这是由于<form>的method属性未正确设置为post,或者JavaScript代码中误用了GET方法,特别需要注意两点:① HTML表单必须显式声明method="post";② 使用window.open()或location.href跳转时,默认使用GET方法,如需POST应改用fetch或XMLHttpRequest。
Q2: 如何保证POST请求的安全性?
A: 建议采取以下组合措施:① 始终使用HTTPS加密传输;② 实施CSRF防护(如Django的csrf_token);③ 对敏感操作要求二次验证;④ 后端验证所有输入数据的合法性;⑤ 设置合理的权限控制(RBAC模型);⑥ 对文件上传做严格的MIME类型校验,例如在Django中,可在视图函数前添加装饰器@csrf_protect,并在表单中包含`{% csrf_token