上一篇
java怎么输出excel后居右显示
Java中,使用Apache POI库生成Excel文件后,可通过设置单元格的水平和垂直对
Java中输出Excel文件并使内容居右显示,通常需要借助第三方库,如Apache POI,Apache POI是一个强大的Java库,用于读写Microsoft Office格式的文件,包括Excel,以下是详细的步骤和代码示例,展示如何使用Apache POI创建一个Excel文件,并使单元格内容居右显示。
添加Apache POI依赖
确保你的项目中包含了Apache POI的依赖,如果你使用的是Maven,可以在pom.xml中添加以下依赖:
<dependencies> <!-Apache POI Core --> <dependency> <groupId>org.apache.poi</groupId> <artifactId>poi</artifactId> <version>5.2.3</version> </dependency> <!-Apache POI for XLSX (Excel 2007+) --> <dependency> <groupId>org.apache.poi</groupId> <artifactId>poi-ooxml</artifactId> <version>5.2.3</version> </dependency> </dependencies>
如果你不是使用Maven,可以手动下载Apache POI的JAR文件并添加到项目的类路径中。
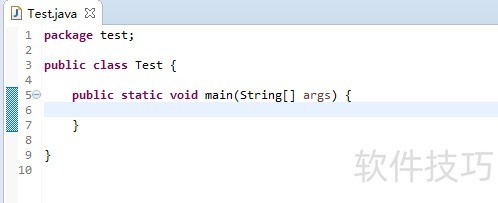
创建Excel文件并设置单元格内容居右
以下是一个完整的Java示例代码,展示如何创建一个Excel文件,并在其中写入内容,同时将单元格内容设置为居右显示。
import org.apache.poi.ss.usermodel.; import org.apache.poi.xssf.usermodel.XSSFWorkbook; import java.io.FileOutputStream; import java.io.IOException; public class ExcelRightAlignExample { public static void main(String[] args) { // 创建工作簿 Workbook workbook = new XSSFWorkbook(); // 创建工作表 Sheet sheet = workbook.createSheet("示例表格"); // 创建单元格样式,设置水平对齐为居右 CellStyle rightAlignStyle = workbook.createCellStyle(); rightAlignStyle.setAlignment(HorizontalAlignment.RIGHT); // 创建字体(可选) Font font = workbook.createFont(); font.setBold(true); font.setFontHeightInPoints((short) 12); rightAlignStyle.setFont(font); // 创建边框(可选) rightAlignStyle.setBorderBottom(BorderStyle.THIN); rightAlignStyle.setBorderTop(BorderStyle.THIN); rightAlignStyle.setBorderLeft(BorderStyle.THIN); rightAlignStyle.setBorderRight(BorderStyle.THIN); // 创建标题行 Row headerRow = sheet.createRow(0); String[] headers = {"编号", "姓名", "年龄", "部门"}; for (int i = 0; i < headers.length; i++) { Cell cell = headerRow.createCell(i); cell.setCellValue(headers[i]); cell.setCellStyle(rightAlignStyle); // 设置列宽,自动根据内容调整 sheet.autoSizeColumn(i); } // 模拟数据 Object[][] data = { {1, "张三", 28, "研发部"}, {2, "李四", 34, "市场部"}, {3, "王五", 23, "人事部"}, {4, "赵六", 30, "财务部"} }; // 填充数据行 for (int rowIndex = 0; rowIndex < data.length; rowIndex++) { Row row = sheet.createRow(rowIndex + 1); // 从第二行开始 Object[] rowData = data[rowIndex]; for (int colIndex = 0; colIndex < rowData.length; colIndex++) { Cell cell = row.createCell(colIndex); // 根据数据类型设置单元格值 if (rowData[colIndex] instanceof String) { cell.setCellValue((String) rowData[colIndex]); } else if (rowData[colIndex] instanceof Integer) { cell.setCellValue((Integer) rowData[colIndex]); } else if (rowData[colIndex] instanceof Double) { cell.setCellValue((Double) rowData[colIndex]); } else { cell.setCellValue(rowData[colIndex].toString()); } // 应用居右样式 cell.setCellStyle(rightAlignStyle); } } // 设置整个工作表的默认样式为居右(可选) // 如果希望所有未单独设置样式的单元格也居右,可以取消注释以下代码 / for (Row row : sheet) { for (Cell cell : row) { CellStyle style = cell.getCellStyle(); style.cloneStyleFrom(rightAlignStyle); } } / // 写入到文件 try (FileOutputStream fileOut = new FileOutputStream("示例.xlsx")) { workbook.write(fileOut); System.out.println("Excel文件已成功创建!"); } catch (IOException e) { e.printStackTrace(); } finally { // 关闭工作簿以释放资源 try { workbook.close(); } catch (IOException ex) { ex.printStackTrace(); } } } }
代码详解
1 创建工作簿和工作表
Workbook workbook = new XSSFWorkbook(); Sheet sheet = workbook.createSheet("示例表格");
- Workbook:表示一个Excel文件。XSSFWorkbook用于处理.xlsx格式的文件,如果需要处理旧的.xls格式,可以使用HSSFWorkbook。
- Sheet:表示Excel中的一个工作表。
2 创建单元格样式并设置居右对齐
CellStyle rightAlignStyle = workbook.createCellStyle(); rightAlignStyle.setAlignment(HorizontalAlignment.RIGHT);
- CellStyle:定义单元格的样式,如字体、颜色、对齐方式等。
- setAlignment(HorizontalAlignment.RIGHT):将单元格内容的水平对齐方式设置为居右。
3 可选:设置字体和边框
Font font = workbook.createFont(); font.setBold(true); font.setFontHeightInPoints((short) 12); rightAlignStyle.setFont(font); rightAlignStyle.setBorderBottom(BorderStyle.THIN); rightAlignStyle.setBorderTop(BorderStyle.THIN); rightAlignStyle.setBorderLeft(BorderStyle.THIN); rightAlignStyle.setBorderRight(BorderStyle.THIN);
- Font:定义字体的样式,如加粗、字体大小等。
- setBorder...:设置单元格的边框样式,这里设置为细边框。
4 创建标题行
Row headerRow = sheet.createRow(0); String[] headers = {"编号", "姓名", "年龄", "部门"}; for (int i = 0; i < headers.length; i++) { Cell cell = headerRow.createCell(i); cell.setCellValue(headers[i]); cell.setCellStyle(rightAlignStyle); sheet.autoSizeColumn(i); }
- createRow(0):在工作表中创建第一行(索引从0开始)。
- createCell(i):在行中创建第i个单元格。
- setCellValue:设置单元格的值。
- setCellStyle:应用之前定义的居右样式。
- autoSizeColumn(i)自动调整第i列的宽度。
5 填充数据行
Object[][] data = { {1, "张三", 28, "研发部"}, {2, "李四", 34, "市场部"}, {3, "王五", 23, "人事部"}, {4, "赵六", 30, "财务部"} }; for (int rowIndex = 0; rowIndex < data.length; rowIndex++) { Row row = sheet.createRow(rowIndex + 1); // 从第二行开始 Object[] rowData = data[rowIndex]; for (int colIndex = 0; colIndex < rowData.length; colIndex++) { Cell cell = row.createCell(colIndex); // 根据数据类型设置单元格值 if (rowData[colIndex] instanceof String) { cell.setCellValue((String) rowData[colIndex]); } else if (rowData[colIndex] instanceof Integer) { cell.setCellValue((Integer) rowData[colIndex]); } else if (rowData[colIndex] instanceof Double) { cell.setCellValue((Double) rowData[colIndex]); } else { cell.setCellValue(rowData[colIndex].toString()); } // 应用居右样式 cell.setCellStyle(rightAlignStyle); } }
- 双重数组data存储要写入Excel的数据。
- 外层循环遍历每一行数据,内层循环遍历每一列数据。
- 根据数据类型调用相应的setCellValue方法。
- 为每个单元格应用居右样式。
6 写入文件并关闭工作簿
try (FileOutputStream fileOut = new FileOutputStream("示例.xlsx")) { workbook.write(fileOut); System.out.println("Excel文件已成功创建!"); } catch (IOException e) { e.printStackTrace(); } finally { try { workbook.close(); } catch (IOException ex) { ex.printStackTrace(); } }
- 使用FileOutputStream将工作簿写入到指定的文件路径。
- workbook.write(fileOut):将工作簿内容写入文件。
- 关闭工作簿以释放资源。
运行结果
运行上述代码后,会在项目根目录下生成一个名为示例.xlsx的Excel文件,打开该文件,可以看到:

- 第一行为标题行,内容居右显示。
- 下面的数据行内容也均为居右显示。
- 可选的字体和边框样式也会应用到相应的单元格中。
相关问答FAQs
问题1:如何在现有Excel文件中追加内容并保持居右显示?
解答:
要在现有Excel文件中追加内容,可以使用FileInputStream读取文件,然后进行修改,以下是一个示例:
import org.apache.poi.ss.usermodel.; import org.apache.poi.xssf.usermodel.XSSFWorkbook; import java.io.; public class AppendToExcelExample { public static void main(String[] args) { try (FileInputStream fis = new FileInputStream("示例.xlsx"); Workbook workbook = new XSSFWorkbook(fis)) { Sheet sheet = workbook.getSheetAt(0); // 获取第一个工作表 int lastRowNum = sheet.getLastRowNum(); // 获取最后一行的行号 // 创建新行 Row newRow = sheet.createRow(lastRowNum + 1); Object[] newData = {5, "孙七", 26, "销售部"}; // 创建或获取居右样式 CellStyle rightAlignStyle = workbook.createCellStyle(); rightAlignStyle.setAlignment(HorizontalAlignment.RIGHT); for (int colIndex = 0; colIndex < newData.length; colIndex++) { Cell cell = newRow.createCell(colIndex); if (newData[colIndex] instanceof String) { cell.setCellValue((String) newData[colIndex]); } else if (newData[colIndex] instanceof Integer) { cell.setCellValue((Integer) newData[colIndex]); } else if (newData[colIndex] instanceof Double) { cell.setCellValue((Double) newData[colIndex]); } else { cell.setCellValue(newData[colIndex].toString()); } cell.setCellStyle(rightAlignStyle); } // 写入到文件 try (FileOutputStream fileOut = new FileOutputStream("示例.xlsx")) { workbook.write(fileOut); System.out.println("新数据已成功追加到Excel文件!"); } } catch (IOException e) { e.printStackTrace(); } } }
说明:

- 使用FileInputStream读取现有的Excel文件。
- 获取工作表并确定当前的最后一行。
- 创建新行并填充数据,应用居右样式。
- 使用FileOutputStream将修改后的工作簿写回到同一个文件。
问题2:如何仅为特定列设置居右显示,而其他列保持默认对齐?
解答:
如果只想为特定列设置居右显示,可以为这些列创建单独的样式,并在填充数据时仅应用到这些列,以下是一个示例:
import org.apache.poi.ss.usermodel.; import org.apache.poi.xssf.usermodel.XSSFWorkbook; import java.io.FileOutputStream; import java.io.IOException; public class PartialRightAlignExample { public static void main(String[] args) { Workbook workbook = new XSSFWorkbook(); Sheet sheet = workbook.createSheet("部分居右"); // 创建标题行样式(默认左对齐) CellStyle headerStyle = workbook.createCellStyle(); headerStyle.setAlignment(HorizontalAlignment.CENTER); // 标题居中 Font headerFont = workbook.createFont(); headerFont.setBold(true); headerStyle.setFont(headerFont); // 创建特定列的居右样式(例如第2列和第4列) CellStyle rightAlignStyle = workbook.createCellStyle(); rightAlignStyle.setAlignment(HorizontalAlignment.RIGHT); Font rightAlignFont = workbook.createFont(); rightAlignFont.setItalic(true); rightAlignStyle.setFont(rightAlignFont); // 创建标题行 Row headerRow = sheet.createRow(0); String[] headers = {"编号", "姓名", "年龄", "部门"}; for (int i = 0; i < headers.length; i++) { Cell cell = headerRow.createCell(i); cell.setCellValue(headers[i]); cell.setCellStyle(headerStyle); sheet.autoSizeColumn(i); } // 模拟数据 Object[][] data = { {1, "张三", 28, "研发部"}, {2, "李四", 34, "市场部"}, {3, "王五", 23, "人事部"}, {4, "赵六", 30, "财务部"} }; // 填充数据行 for (int rowIndex = 0; rowIndex < data.length; rowIndex++) { Row row = sheet.createRow(rowIndex + 1); Object[] rowData = data[rowIndex]; for (int colIndex = 0; colIndex < rowData.length; colIndex++) { Cell cell = row.createCell(colIndex); if (rowData[colIndex] instanceof String) { cell.setCellValue((String) rowData[colIndex]); } else if (rowData[colIndex] instanceof Integer) { cell.setCellValue((Integer) rowData[colIndex]); } else if (rowData[colIndex] instanceof Double) { cell.setCellValue((Double) rowData[colIndex]); } else { cell.setCellValue(rowData[colIndex].toString()); } // 仅为第1列(姓名)和第3列(部门)设置居右样式 if (colIndex == 1 || colIndex == 3) { cell.setCellStyle(rightAlignStyle); } else { cell.setCellStyle(headerStyle); // 其他列使用默认样式或另外定义的样式 } } } // 写入到文件 try (FileOutputStream fileOut = new FileOutputStream("部分居右示例.xlsx")) { workbook.write(fileOut); System.out.println("部分居右的Excel文件已成功创建!"); } catch (IOException e) { e.printStackTrace(); } finally { try { workbook.close(); } catch (IOException ex) { ex.printStackTrace(); } } } }
说明:
- 创建不同的样式:行和特定列创建不同的CellStyle行使用居中对齐,特定列(如第2列和第4列)使用居右对齐。
- 应用样式:在填充数据时,根据列索引判断是否应用特定的居右样式,其他列可以使用默认样式或另外定义的样式。