上一篇
如何在html页面中添加表格数据类型
HTML页面中,使用` 标签创建表格,通过 定义行, 或
HTML表格的基本结构
HTML表格由<table>标签定义,包含表头(<thead>)、表体(<tbody>)和可选的表尾(<tfoot>),每个部分由行(<tr>)组成,行内包含单元格(<td>或<th>)。
示例代码:
<table border="1"> <thead> <tr> <th>序号</th> <th>姓名</th> <th>年龄</th> <th>职业</th> </tr> </thead> <tbody> <tr> <td>1</td> <td>张三</td> <td>28</td> <td>工程师</td> </tr> <tr> <td>2</td> <td>李四</td> <td>34</td> <td>设计师</td> </tr> </tbody> </table>
关键点说明:
- <table>:定义表格区域,可添加属性如border(已废弃,推荐用CSS控制边框)。
- <thead>:表头部分,通常包含列标题,建议使用<th>
- <tbody>:表体部分,存放数据行,使用<td>定义数据单元格。
- <th>与<td>的区别:<th>默认加粗且居中,通常用于表头。
表格数据的动态添加
在实际开发中,表格数据可能来自后端接口或用户输入,需通过JavaScript动态生成,以下是两种常见场景:
从数组渲染表格
const data = [ { id: 1, name: '王五', age: 25, job: '教师' }, { id: 2, name: '赵六', age: 30, job: '医生' } ]; const table = document.createElement('table'); const thead = table.createTHead(); const headers = ['序号', '姓名', '年龄', '职业']; let headerRow = thead.insertRow(); headers.forEach(text => { let th = document.createElement('th'); th.textContent = text; headerRow.appendChild(th); }); const tbody = table.createTBody(); data.forEach(item => { let row = tbody.insertRow(); row.insertCell().textContent = item.id; row.insertCell().textContent = item.name; row.insertCell().textContent = item.age; row.insertCell().textContent = item.job; }); document.body.appendChild(table);
通过AJAX获取数据并填充表格
fetch('https://api.example.com/users') .then(response => response.json()) .then(data => { const table = document.getElementById('userTable'); data.forEach(user => { let row = table.insertRow(); row.insertCell().textContent = user.id; row.insertCell().textContent = user.name; row.insertCell().textContent = user.age; row.insertCell().textContent = user.job; }); });
表格样式的优化
纯HTML表格可能显得单调,需结合CSS提升视觉效果,以下是一些实用技巧:

基础样式调整
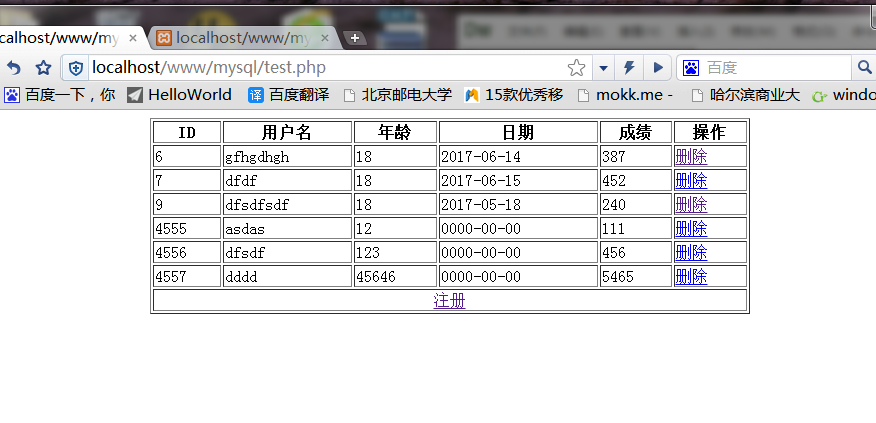
table { width: 100%; border-collapse: collapse; / 合并边框 / } th, td { padding: 12px; text-align: left; border: 1px solid #ddd; } th { background-color: #f4f4f4; font-weight: bold; } tr:nth-child(even) { background-color: #f9f9f9; / 隔行变色 / }
响应式表格设计
为适应移动设备,可使用媒体查询或CSS框架(如Bootstrap)优化表格:
@media (max-width: 600px) { table, thead, tbody, th, td, tr { display: block; / 转为块级元素 / } thead { position: absolute; / 隐藏表头 / } tr { margin-bottom: 15px; } td { text-align: right; padding-left: 50%; / 留出表头空间 / position: relative; } td::before { content: attr(data-label); / 显示表头文本 / position: absolute; left: 0; width: 50%; padding-left: 15px; font-weight: bold; } }
增强表格功能的JavaScript技巧
排序功能
document.querySelectorAll('th').forEach(th => { th.addEventListener('click', () => { const table = th.closest('table'); const tbody = table.tBodies[0]; const rows = Array.from(tbody.rows); const index = Array.from(th.parentNode.children).indexOf(th); const ascending = th.classList.contains('asc'); rows.sort((a, b) => { const cellA = a.cells[index].textContent; const cellB = b.cells[index].textContent; return ascending ? cellA.localeCompare(cellB) : cellB.localeCompare(cellA); }); rows.forEach(row => tbody.appendChild(row)); th.classList.toggle('asc', !ascending); }); });
分页功能
const rowsPerPage = 10; let currentPage = 1; const table = document.getElementById('dataTable'); const tbody = table.tBodies[0]; const rows = Array.from(tbody.rows); function renderPage(page) { currentPage = page; const start = (page 1) rowsPerPage; const end = start + rowsPerPage; rows.forEach((row, index) => { row.style.display = (index >= start && index < end) ? '' : 'none'; }); } // 添加分页按钮(略)
语义化与无障碍访问
为确保表格对屏幕阅读器友好,需注意:
- 正确使用<th>和<caption>:<caption>为表格添加标题,<th>明确表头含义。
- 避免仅用颜色区分数据:需结合图案或文本标识。
- 键盘导航支持:确保<tab>键可顺序聚焦表格单元格。
FAQs
Q1:如何让表格在移动设备上自适应宽度?
A1:使用CSS的@media查询调整表格布局,或将表格转换为弹性布局(如使用display: flex或CSS Grid),设置table的宽度为100%,并为单元格添加box-sizing: border-box以避免溢出。
Q2:如何通过JavaScript修改表格中的特定单元格?
A2:首先通过document.querySelector或document.getElementById定位目标单元格,然后修改其textContent或innerHTML属性。
const cell = document.querySelector('table#myTable tr:nth-child(2) td:nth-child(3)'); cell.textContent = '新值'; // 修改第三列第二行的内容