上一篇
服务器WordPress安装教程
在服务器上安装PHP、MySQL和Web服务环境(如Apache/Nginx),创建数据库及用户,下载WordPress并解压到网站根目录,配置 wp-config.php文件中的数据库信息,最后通过浏览器访问域名运行安装向导完成设置。
在服务器上安装WordPress是建立专业网站的关键步骤,本指南将提供经过验证的标准化流程,涵盖从环境准备到安全加固的全套方案,适用于Ubuntu/CentOS等主流Linux系统,遵循这些步骤可确保您的网站符合最佳实践。
安装前准备
服务器要求
- 操作系统:Ubuntu 20.04+/CentOS 7+
- PHP 7.4+(推荐8.0+)含扩展:curl, gd, mysqli
- MySQL 5.7+或MariaDB 10.4+
- Web服务器:Apache或Nginx
- 至少1GB内存(2GB以上更佳)
<div class="card"> <h3>必要信息</h3> <ul> <li>服务器SSH登录凭证</li> <li>数据库名称/用户名/密码</li> <li>已解析到服务器的域名(如example.com)</li> <li>FTP/SFTP客户端(如FileZilla)</li> </ul> </div> </div>
详细安装步骤
步骤1:连接服务器
使用SSH客户端登录:
ssh username@server_ip # 更新系统包(Ubuntu示例) sudo apt update && sudo apt upgrade -y步骤2:安装运行环境
<div id="apache" class="tabcontent" style="display:block"> <h4>Apache + MySQL + PHP</h4> <pre><code># 安装组件(Ubuntu)
sudo apt install apache2 mysql-server php libapache2-mod-php php-mysql php-cli
验证安装
sudo systemctl status apache2
php -v
sudo apt install nginx mysql-server php-fpm php-mysql
启动服务
sudo systemctl start nginx php-fpm
步骤3:配置数据库
sudo mysql -u root # 在MySQL命令行执行: CREATE DATABASE wordpress_db; CREATE USER 'wp_user'@'localhost' IDENTIFIED BY 'StrongPassword123!'; GRANT ALL PRIVILEGES ON wordpress_db.* TO 'wp_user'@'localhost'; FLUSH PRIVILEGES; EXIT;安全提示: 将StrongPassword123!替换为包含大小写字母、数字和符号的强密码
步骤4:安装WordPress核心文件
cd /tmp wget https://wordpress.org/latest.tar.gz tar -xzvf latest.tar.gz sudo mv wordpress /var/www/html/ sudo chown -R www-data:www-data /var/www/html/wordpress步骤5:配置Web服务器
Apache配置:
sudo nano /etc/apache2/sites-available/wordpress.conf # 添加以下内容: <VirtualHost *:80> ServerName example.com DocumentRoot /var/www/html/wordpress <Directory /var/www/html/wordpress> AllowOverride All </Directory> </VirtualHost> # 启用配置 sudo a2ensite wordpress sudo a2enmod rewrite sudo systemctl restart apache2 <h4>Nginx配置:</h4> <pre><code>sudo nano /etc/nginx/sites-available/wordpressserver {
listen 80;
server_name example.com;
root /var/www/html/wordpress;

启用配置
sudo ln -s /etc/nginx/sites-available/wordpress /etc/nginx/sites-enabled/
sudo nginx -t && sudo systemctl reload nginx
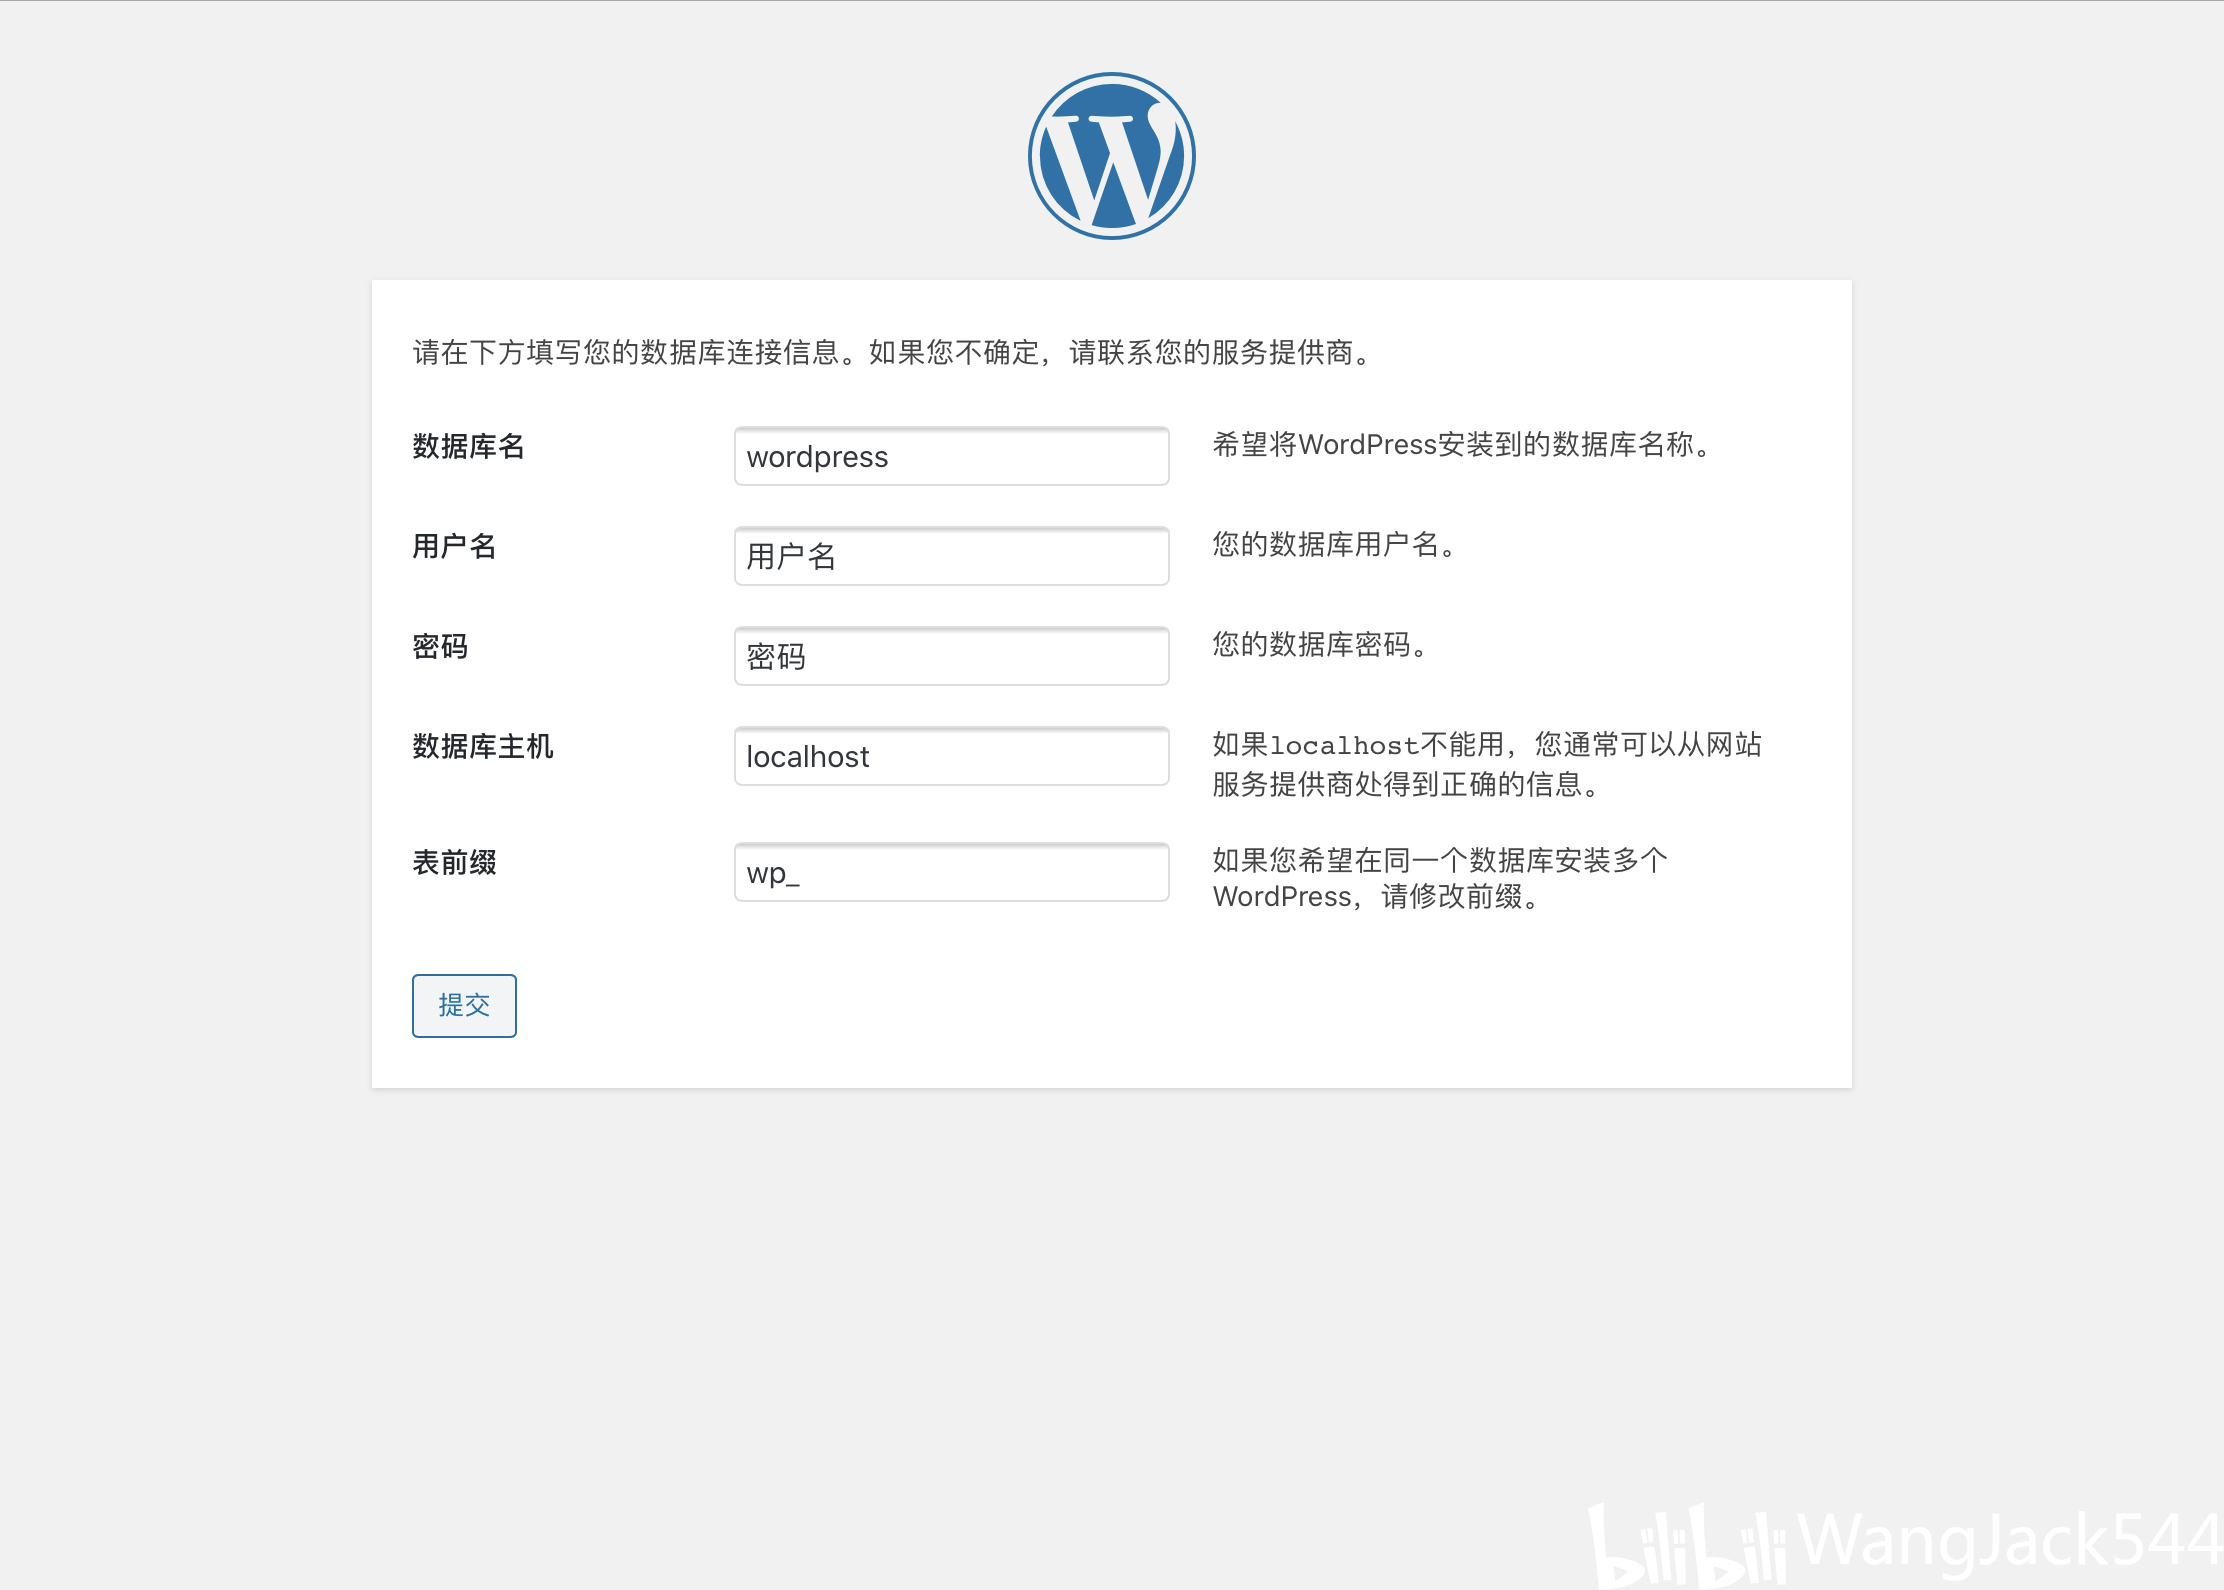
步骤6:完成安装向导
- 浏览器访问 http://your_server_ip 或域名
- 选择语言后进入数据库设置页面
- 填写数据库信息:
- 数据库名:wordpress_db
- 用户名:wp_user
- 密码:创建数据库时设置的密码
- 数据库主机:localhost
- 表前缀:wp_(建议修改为随机前缀如wp9a3d_)
- 设置网站标题、管理员账号和邮箱
- 点击”安装WordPress”完成
安装向导界面示例:
关键安全加固措施
- 文件权限设置: sudo find /var/www/html/wordpress/ -type d -exec chmod 755 {} \; sudo find /var/www/html/wordpress/ -type f -exec chmod 644 {} \;
- 禁用文件编辑: 在wp-config.php添加: define('DISALLOW_FILE_EDIT', true);
- 安装SSL证书: 使用Let’s Encrypt免费证书 # Ubuntu/Apache示例: sudo apt install certbot python3-certbot-apache sudo certbot --apache -d example.com
- 启用防火墙: sudo ufw allow 80,443,22/tcp sudo ufw enable
常见问题解决
- 安装时出现”无法建立数据库连接”
- → 检查 wp-config.php中的数据库凭证是否正确
→ 确认MySQL服务正在运行: sudo systemctl status mysql
<dt> 页面显示404错误</dt> <dd>→ Apache用户需启用mod_rewrite:<code>sudo a2enmod rewrite</code><br> → Nginx检查location配置是否正确</dd> <dt> 文件上传权限问题</dt> <dd>→ 设置正确所有者:<code>sudo chown -R www-data:www-data /var/www/html/wordpress</code><br> → 修改wp-content权限:<code>sudo chmod -R 775 wp-content</code></dd>
</dl>
后续优化建议
- 登录后台立即更新所有插件和主题
- 安装安全插件如Wordfence或iThemes Security
- 设置定期自动备份(推荐UpdraftPlus插件)
- 配置缓存插件提升速度(WP Super Cache或W3 Total Cache)
- 通过Google Search Console提交网站地图
完成这些步骤后,您的WordPress网站已具备生产环境部署条件,建议每季度审查一次服务器日志和安全设置,保持系统处于最佳状态。
引用资源
- WordPress官方安装指南:https://wordpress.org/support/article/how-to-install-wordpress/
- Let’s Encrypt证书文档:https://letsencrypt.org/docs/
- Linux服务器安全加固指南:CIS Ubuntu Benchmark
- MySQL 8.0官方手册:https://dev.mysql.com/doc/refman/8.0/en/