上一篇
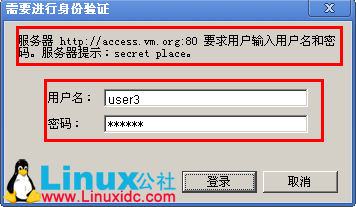
html如何做登录界面
使用`
包裹,添加文本框(
)和密码框(),配合提交按钮实现
核心组件解析
基础表单架构
所有登录功能均基于 <form> 标签实现,其核心作用是封装用户输入数据并向服务器发送请求,关键属性包括:
action: 指定表单提交的目标 URL(通常指向后端接口)method: 定义数据传输方式(推荐POST以保护敏感信息)autocomplete="off": 禁用浏览器自动填充历史记录(增强隐私性)
<form action="/login" method="POST" autocomplete="off">
  <!-表单内容 -->
</form>
输入字段规范
| 元素类型 | 用途 | 必设属性 | 可选增强属性 |
|---|---|---|---|
<input type="text"> |
用户名/邮箱 | name, required, pattern |
maxlength, minlength |
<input type="password"> |
密码 | name, required |
pattern, toggleVisibility |
<button type="submit"> |
提交按钮 | type="submit" |
disabled(动态控制) |
最佳实践示例:
<div class="input-group">
  <label for="username">用户名/邮箱</label>
  <input
    type="text"
    id="username"
    name="username"
    required
    pattern="[a-zA-Z0-9._%+-]+@[a-zA-Z0-9.-]+.[a-zA-Z]{2,}$|^[a-zA-Z][a-zA-Z0-9]{5,19}$""请输入有效邮箱或6-20位字母开头的用户名"
    placeholder="example@domain.com 或 user123"
  >
  <span class="error-message" id="username-error"></span>
</div>
标签关联原则
必须为每个输入字段添加对应的 <label>,并通过 for 属性与 id 建立关联,这带来三大优势:
提升可访问性(屏幕阅读器兼容)
扩大点击区域(方便移动端操作)
自然聚焦效果(点击标签即激活输入框)
视觉设计与布局方案
容器定位策略
采用双层嵌套结构实现完美居中:
body {
  display: flex;
  justify-content: center;
  align-items: center;
  min-height: 100vh;
  background: linear-gradient(135deg, #f5f7fa 0%, #c3cfe2 100%);
}
.login-container {
  width: 100%;
  max-width: 400px;
  padding: 2rem;
  background: white;
  border-radius: 8px;
  box-shadow: 0 4px 6px rgba(0,0,0,0.1);
}
输入框美化技巧
通过 CSS 伪类实现动态反馈:
input {
  width: 100%;
  padding: 12px 15px;
  margin-bottom: 1rem;
  border: 2px solid #ddd;
  border-radius: 4px;
  transition: all 0.3s ease;
}
input:focus {
  border-color: #4a90e2;
  outline: none;
  box-shadow: 0 0 0 3px rgba(74,144,226,0.2);
}
input.error {
  border-color: #ff4444;
}
响应式适配要点
针对不同设备调整布局:
| 断点 | 修改项 | 典型值 |
|————|——————————–|————————-|
| 手机端 | 缩小内边距 | padding: 1.5rem |
| 平板横屏 | 限制最大宽度 | max-width: 500px |
| 高分辨率 | 增加图标间距 | margin-right: 10px |
交互逻辑增强
客户端验证体系
在提交前进行本地校验可显著减少无效请求:
document.querySelector('form').addEventListener('submit', function(e) {
  const username = document.getElementById('username');
  const password = document.getElementById('password');
  let isValid = true;
  // 用户名非空校验
  if (!username.value.trim()) {
    showError(username, '用户名不能为空');
    isValid = false;
  }
  // 密码复杂度校验
  if (password.value.length < 8) {
    showError(password, '密码至少8位字符');
    isValid = false;
  }
  if (!isValid) e.preventDefault();
});
function showError(input, message) {
  const errorEl = input.nextElementSibling;
  errorEl.textContent = message;
  input.classList.add('error');
}
密码可见性切换
添加眼睛图标实现明文/密文切换:

<div class="password-wrapper">
  <input type="password" id="password" name="password" required>
  <button type="button" class="toggle-password" aria-label="显示密码">️</button>
</div>
<script>
document.querySelector('.toggle-password').addEventListener('click', function() {
  const pwdField = document.getElementById('password');
  const type = pwdField.getAttribute('type') === 'password' ? 'text' : 'password';
  pwdField.setAttribute('type', type);
  this.textContent = type === 'password' ? '️' : '';
});
</script>
安全加固措施
尽管 HTML 本身不具备加密能力,但可通过以下方式降低风险:
️ 重要提示:永远不要将密码明文存储在 localStorage/sessionStorage!
| 风险点 | 解决方案 | 实施代码 |
|---|---|---|
| CSRF攻击 | 添加防伪令牌 | <input type="hidden" name="csrf_token" value="{{ csrf_token }}"> |
| XSS注入 | 转义特殊字符 | 后端需对 username 进行 HTMLEntity 编码 |
| 暴力破解 | 限制尝试次数+验证码 | 连续失败5次后显示图形验证码 |
| 钓鱼防范 | 强制HTTPS+HSTS头 | 服务器配置 Strict-Transport-Security: max-age=31536000 |
完整代码示例
<!DOCTYPE html>
<html lang="zh-CN">
<head>
  <meta charset="UTF-8">
  <meta name="viewport" content="width=device-width, initial-scale=1.0">用户登录</title>
  <style>
    body { font-family: 'Segoe UI', sans-serif; }
    .login-container { / 同前文样式 / }
    .remember-me { display: flex; align-items: center; margin: 1rem 0; }
    .forgot-link { color: #4a90e2; text-decoration: none; }
    .social-login { margin-top: 1.5rem; text-align: center; }
    .divider { display: flex; align-items: center; margin: 1rem 0; }
    .divider::before, .divider::after { content: ""; flex: 1; height: 1px; background: #ddd; }
    .divider span { padding: 0 1rem; color: #999; }
  </style>
</head>
<body>
  <div class="login-container">
    <h2>欢迎登录</h2>
    <form action="/auth/login" method="POST">
      <div class="input-group">
        <label for="username">用户名/邮箱</label>
        <input type="text" id="username" name="username" required placeholder="请输入账号">
        <span class="error-message" id="username-error"></span>
      </div>
      <div class="input-group">
        <label for="password">密码</label>
        <div class="password-wrapper">
          <input type="password" id="password" name="password" required placeholder="请输入密码">
          <button type="button" class="toggle-password" aria-label="显示密码">️</button>
        </div>
        <span class="error-message" id="password-error"></span>
      </div>
      <div class="remember-me">
        <input type="checkbox" id="remember" name="remember">
        <label for="remember">记住我</label>
      </div>
      <button type="submit" class="btn-primary">立即登录</button>
    </form>
    <div class="forgot-password">
      <a href="/reset-password" class="forgot-link">忘记密码?</a>
    </div>
    <div class="social-login">
      <p>或使用以下方式登录</p>
      <div class="divider"><span>OR</span></div>
      <button type="button" class="btn-google">Google账号</button>
      <button type="button" class="btn-github">GitHub账号</button>
    </div>
    <div class="register-link">
      还没有账号?<a href="/register">立即注册</a>
    </div>
  </div>
  <script>
    // 此处添加之前的JS验证逻辑
  </script>
</body>
</html>
相关问答 FAQs
Q1: 如何处理「记住我」功能的跨会话保持?
A: 当用户勾选「记住我」时,应在成功登录后设置长期有效的 Cookie(建议设置 Max-Age=30天),并将凭证存储在服务端数据库而非客户端,注意:
- 使用
HttpOnly标志防止 JavaScript 访问 - 采用加密签名防止改动
- 提供明确的退出入口(如页脚的「退出登录」)
Q2: 移动端登录框出现键盘遮挡怎么办?
A: 通过视口元标签和弹性布局解决:
<meta name="viewport" content="width=device-width, initial-scale=1.0, maximum-scale=1.0, user-scalable=no">
配合 CSS 确保表单始终可见:
@media (max-height: 600px) {
  .login-container {
    position: absolute;
    top: 50%;
    transform: translateY(-50%);
  }
}
对于 iOS WebKit 引擎,还需添加:
<meta name="apple-mobile-web-app-capable" content="yes">
<meta name="apple-mobile-web-app-status-bar-style" content="black-translucent">
通过以上系统化实施方案,可构建出既符合现代审美又具备良好用户体验的登录界面,实际开发中需根据具体业务需求调整验证规则和交互细节,建议配合后端 API 文档进行联调测试